Flappy Bird
Animate (Flash) CC HTML5 Tutorial
Part 1
– based on-
https://blogs.adobe.com/creativecloud/building-a-html5-flappy-bird-game-clone-with-adobe-animate-cc/
My Version Part 1 - PDF
· Create the ground, the pipes, and the crash screen
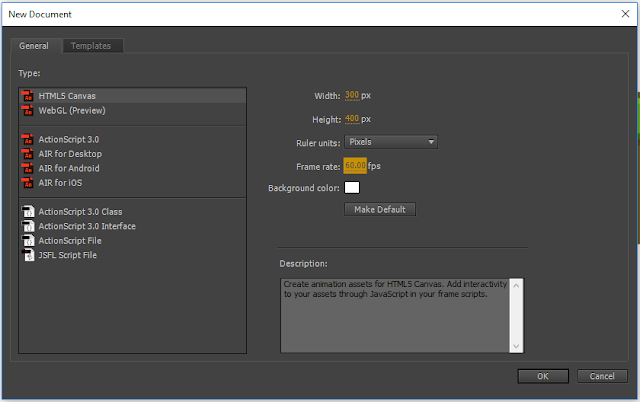
Note: HTML5 Canvas -Width 300 -Height 400 -Frame rate 60 fps
1. Create the Ground
Create New Symbol (ctrl F8): ground – movie clip
While editing the movie clip:
Create Layer: grass light
Draw empty black box – set size to 193, 8 position (0, 4)
Zoom in (z)
Choose anchor point tool (=)– set points varying distances along the bottom of the box
Switch to selection tool (v) then pull the different sections down to form bumps
Fill it green 72BE32 and remove the outline -LOCK
Duplicate Grass Light Layer: Grass Medium
UNLOCK – paint 4B841D (0, 6) – LOCK – drag layer below Grass Light
Duplicate Grass Light Layer: Grass Dark
UNLOCK – paint 665025 (0, 8) – LOCK – drag layer below Grass Medium
Create Layer: Dirt Dark
Rectangle – 193x50 (0, 0) – brown 7B6233 - LOCK
Duplicate Dirt Dark layer: Dirt Light
UNLOCK – paint 85D93D Size 193x2 (0, 2)
Drag dirt dark and dirt light below grass layers
add your blog address above Dirt Dark
– LOCK all Layers
add your blog address above Dirt Dark
– LOCK all Layers
Click on Scene 1 to exit ground symbol editing
2. Create the Pipes
Create New Symbol (ctrl F8) : Pipes – movie clip
Rename Layer1 : Pipe Bottom
Draw a rectangle – no edge – any colour set size to 48x179 position (6, 24)
Apply a linear gradient (menu: window – color) left size 59C900 – right side 459E00 - then add to swatches – use the paint bucket to apply the gradient to the pipe bottom
LOCK & HIDE – Pipe Bottom layer
Create a new layer: Pipe Top
Using the same linear gradient swatch – select rectangle tool and set the Rectangle Option edges to radius 3
Draw a rectangle 60x27 (0, 0) – radius 3 –
LOCK & HIDE both layers
Create a new layer: Shadow Bottom – move layer to just above Pipe Bottom layer
Draw a rectangle - no edge – 377E00 – 40% alpha – radius 0 48x11 (6, 25)
Choose Modify – Transform – Distort then drag the bottom left corner straight upwards by about half the distance - LOCK
Create a new Layer at the very top: Shadow Top
choose rectangle tool – unlock corner radiuses then set top left and top right to radius 3 – bottom left and bottom right to 0
Draw a rectangle 60x3 (0, 0)
Create a new layer at the very top: Highlight
Draw a line 6BDB12– stroke 5 -height 12 (6, 8)
Draw another line height 166 (13, 33)
LOCK all layers – UNHIDE all layers
3. Crash Screen Flash
Create new symbol (CTRL F8) : Screen Flash – movie clip
Draw a white rectangle FFFFFF NOTE: Alpha 100% and radius 0
You will not be able to see it with the white background. Drag the selection tool over it.
Then set these values: 300x400 (-150, -200)


this was a a were confusing project 10/10
ReplyDelete